Website Design & Hosting

Endless Potential

With the power of wordpress, I can create a custom site that will suite any product.

I specialize in creating custom websites tailored to your specific needs. Whether it’s an eCommerce platform like the GrowRight website I built, or a resource hub like the Wikipedia database I set up using Kiwix, I can bring your vision to life. My process involves using reliable technologies like Docker and MariaDB to ensure your website is secure, fast, and easy to manage.

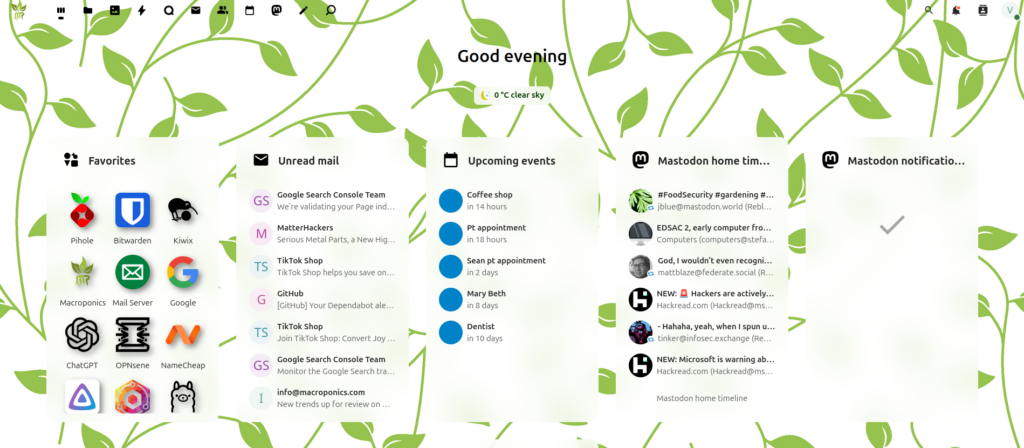
Webview Example
Webview Example

I am offering a custom-hosted Nextcloud service through Macroponics.cloud, providing secure and reliable cloud storage solutions tailored to your needs. With this service, you’ll have your own private cloud where you can store, share, and access files with ease. Additionally, the service comes with a custom email domain and email server hosting, allowing you to manage both your files and communications under a single platform.

Let me help you take control of your data and communications with a reliable, secure cloud solution.

Latest Blog Posts on Website Design & Hosting
March 20, 2025Docker is a simple and easy to use program once you learn the basic command structure. Learning docker can be complicated so I have composed this article to serve as a guide for some of the commands I use the most often when I am setting up sites with docker. What is docker? Docker is a containerization platform that allows you to package applications and their dependencies into lightweight, portable containers. These containers run on any system that has Docker installed, eliminating the “works on my machine” problem. Unlike traditional virtual machines, Docker provides an efficient way to deploy, scale, and manage applications without the overhead of a full operating system for each instance. Docker vs. Virtual Machines (Hypervisors vs. Containers) To understand Docker, it’s helpful to compare it to traditional virtualization. A hypervisor, such as VirtualBox or VMware, creates and runs multiple virtual machines (VMs) on a host system. Each VM has its own full operating system, requiring significant resources. Docker, on the other hand, uses containers, which share the host OS kernel while isolating applications and dependencies. This makes containers much lighter and faster than VMs. Instead of booting an entire OS for each instance, Docker only runs the necessary processes, reducing resource consumption and startup times. FeatureVirtual Machines (Hypervisors)Docker (Containers)Boot TimeMinutesSecondsResource UsageHigh (full OS per VM)Low (shared OS kernel)IsolationFull OS isolationProcess-level isolationPortabilityLimited by OS compatibilityHighly portable (works on any system with Docker) Why Linux is Best for Docker Linux is the preferred OS for Docker due to its native container support, better performance, and higher stability. Unlike Windows or macOS, which require a virtual machine to run Docker, Linux supports containers directly, reducing overhead and improving efficiency. It also provides more control over system resources, networking, and storage configurations. Most cloud providers and production environments use Linux for Docker, making it the best choice for development and deployment. If you want a faster, more reliable Docker experience, Linux is the way to go. Installing Docker on Linux For this example I will be providing instructions for Debian/Ubuntu distributions of Linux. Step 1: Update Your System Before installing Docker, update your package list: sudo apt update && sudo apt upgrade -y Step 2: Install Required Dependencies sudo apt install -y ca-certificates curl gnupg Step 3: Add Docker’s Official GPG Key sudo install -m 0755 -d /etc/apt/keyrings curl -fsSL https://download.docker.com/linux/ubuntu/gpg | sudo tee /etc/apt/keyrings/docker.asc > /dev/null sudo chmod a+r /etc/apt/keyrings/docker.asc Step 4: Add Docker’s Repository echo “deb [arch=$(dpkg –print-architecture) signed-by=/etc/apt/keyrings/docker.asc] \ https://download.docker.com/linux/ubuntu $(lsb_release -cs) stable” | \ sudo tee /etc/apt/sources.list.d/docker.list > /dev/null sudo apt update Step 5: Install Docker sudo apt install -y docker-ce docker-ce-cli containerd.io docker-buildx-plugin docker-compose-plugin Step 6: Start and Enable Docker sudo systemctl start docker sudo systemctl enable docker Step 7: Verify the Installation Run the following command to check if Docker is installed and running: docker –version Test with a simple container: sudo docker run hello-world docker compose VS docker run If you’re new to Docker, you might have seen people using long docker run commands to start containers. While this works, it’s not the best way to manage Docker applications, especially if you’re running multiple containers or want to easily share your setup with others. Instead, Docker provides a better method: YAML configuration files Here’s why using a YAML configuration files is a better practice: Easier Deployment – A single .yml file allows you to quickly set up and tear down containers without needing to remember long docker run commands. Better Maintainability – If you need to modify configurations, it’s easier to edit a .yml file than rewriting commands. Multi-Container Management – Docker Compose allows you to define multiple containers in one file and start them all at once. Portability – You can share a .yml file with others, allowing them to deploy the same environment easily. Persistent Storage & Networking – It makes it simple to configure volumes, networks, and dependencies between containers. Here is an example of a docker run command. This will install a nginx web server. docker run -d -p 8080:80 –name myweb nginx:latest in this example the -d means detached, this will make it so the logs do not run in the terminal you run the command into. The -p 8080:80 sets the internal port for the nginx web service to port 80 and assigns the external port to 8080. the –name tag makes it a little easier to identify the container when running commands like: docker ps the docker ps command will list all of the containers that are currently active. As previously mentioned, docker run can be great for testing and temporary setups, however, its generally better practice to create a yaml file for the container. Here is an example of a docker-compose.yml file that runs the same server with the same settings: services: web: image: nginx:latest ports: – “8080:80” restart: unless-stopped This .yml file will always restart if an error occurs within the container, however, if you reboot the host system it will not restart the container. If you want the container to always reboot, even after host system reboots. You can just change the restart tag to always. Your code would then look like: services: web: image: nginx:latest ports: – “8080:80” restart: always for the rest of this tutorial we will be using a yaml file. Why Use Docker Networks? By default, Docker containers cannot talk to each other unless they are in the same network. If you define a custom network in your docker-compose.yml file, containers can easily find and communicate with each other using their service names instead of IP addresses. Here is an example of a yaml file that utilizes docker networks: services: web: image: nginx:latest ports: – “8080:80” networks: – mynetwork database: image: mysql:latest environment: MYSQL_ROOT_PASSWORD: ${MYSQL_ROOT_PASSWORD} networks: – mynetwork networks: mynetwork: driver: bridge Breaking It Down: The bridge driver is used to create an isolated virtual network. The networks tag at the bottom defines a custom network called mynetwork. Each service (web and database) is assigned to mynetwork, allowing them to communicate. You will also notice that I have changed the password to use a format that allows you to create a .env file with login credentials you can create a .env file by running this command in a terminal: sudo nano .env .env files are formatted as follows: MYSQL_ROOT_PASSWORD=examplepassword DB_USER=admin DB_NAME=mydatabase Key Benefits of Using networks Better Security – Containers in the same network can talk, while others cannot. Easier Communication – Containers can reference each other by name instead of IP addresses. Scalability – You can add more services to the network without reconfiguring connections. Portability – The entire setup is defined in YAML and can be deployed anywhere. Using the networks tag in Docker Compose is a best practice for managing multi-container applications. Conclusion Docker is a powerful tool that simplifies application deployment by using lightweight containers instead of traditional virtual machines. We covered the basics of how Docker works, why Linux is the preferred environment, how to install it, and the advantages of using docker-compose.yml files for managing multi-container setups. By leveraging Docker, you can create scalable, portable, and easily deployable applications with minimal effort. Whether you’re hosting a website, setting up a database, or running a cloud service, Docker makes development and deployment more efficient. Thank you for reading! I hope this guide was helpful. If you have any questions or suggestions for improvement, feel free to leave a comment. Happy containerizing! […]